

Skip the intro · jump to the list ↓
Too many Halloween craft ideas floating around out there? Same! You open Pinterest looking for one cute project. An hour later you have forty tabs open and zero glue sticks used.
That’s exactly the problem this list solves. Every idea here got pulled from hundreds of pins. Only the ones that are actually doable, actually cheap and actually cute enough for a real living room made the cut!
No fancy tools required. No weekend-long projects either. Most of these use things already sitting in a junk drawer or a recycling bin.
Think mason jars, toilet paper rolls, paper bags and a little paint. Simple materials, big spooky payoff, am I right?
Use this list however works for you. Pick one project for a slow Sunday, or knock out five in an afternoon, lol!
Under each idea you’ll find the little details that matter, plus a link straight to the full tutorial.
DIY HOME HALLOWEEN CRAFTS
Mason Jar Ghost Lights
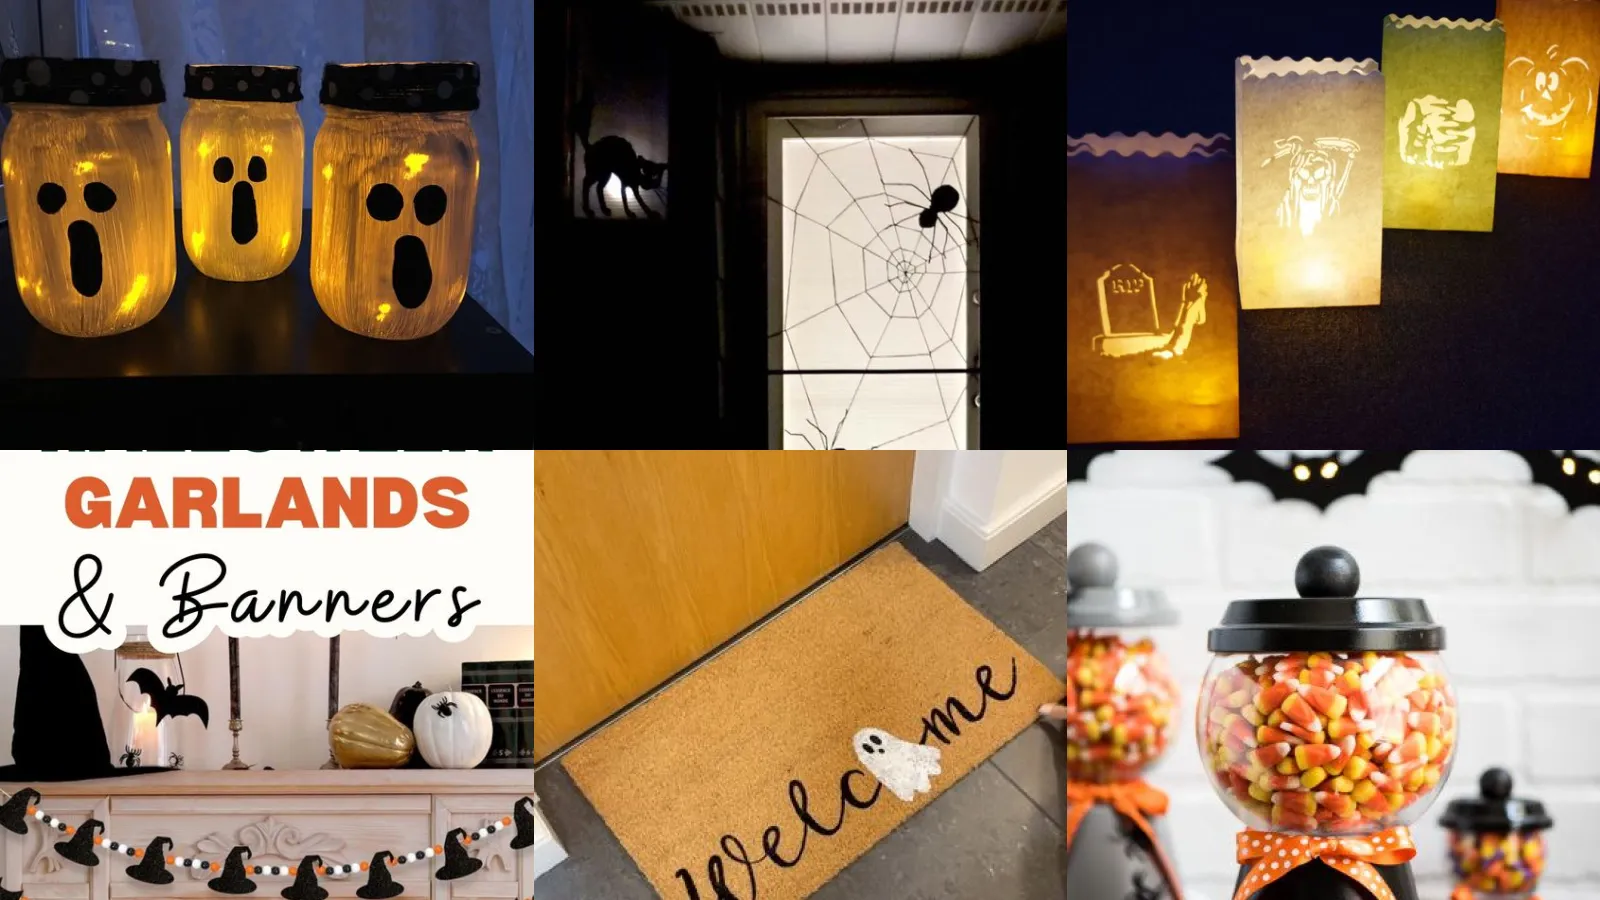
Mason jars turn into tiny ghosts with just white paint and a black marker for the face. Add a battery tea light inside and they glow the second the sun goes down!
No fussy painting skills needed here. A sponge dabbed over the glass gives that soft, uneven ghost texture without any real effort. Even a shaky hand still ends up with something cute.
- Glows without a single cord
- Battery tea light does the work
- Sponge paint hides mistakes fast
Paper Bag Pumpkin Luminaries
Paper bag luminaries might be the easiest thing on this whole list. Cut a pumpkin face out, drop a light inside and set it along the porch steps.
They fold flat for storage too, so next October takes about five minutes to set up again! A stack of ten barely takes up any closet space.
- Flat pack storage forever
- Cuts with regular scissors
- Lines a porch in minutes
Toilet Paper Roll Bats
Toilet paper rolls make surprisingly convincing bats once they get a coat of black paint and a set of paper wings. Prop a whole colony on a mantel, or string them across a doorway.
This is a great one for using up rolls you’ve been hoarding for no reason, haha!
- Uses up the recycling pile
- Black paint covers any print
- Wings cut from scrap cardstock
Painted Rock Spiders
Rocks from the yard become spiders with a few coats of black paint and pipe cleaner legs. Group a bunch on a windowsill and it looks like an infestation, in the best way!
Kids love painting these. Honestly so do the adults, lol! Who doesn’t love turning yard rocks into something creepy?
- Free supplies from the backyard
- Pipe cleaner legs bend easily
- Dries in about an hour
Popsicle Stick Skeletons
Popsicle sticks glued into a little skeleton shape make one of the more charming crafts on this whole list. Add a marker face and it’s ready to hang on a door or window!
This one works great as a classroom party project too. Cheap, quick and every finished skeleton looks a little different.
- Every skeleton comes out unique
- Craft glue holds joints well
- Marker face takes seconds
Felt Candy Corn Garland
Felt candy corn shapes strung together make a garland that survives storage way better than paper ones. String it along a mantel, a window or a stair railing.
The colors alone make a room feel festive with almost no other decorating needed. How cute is that?
- Survives storage year after year
- Felt holds shape without ironing
- No sewing machine required
Spooky Spider Web Doorway
A stretched web across the doorway sets the tone before guests even step inside. Cheesecloth or spider web material both work. A few plastic spiders finish the scene.
Not into full commitment? Do just the top corner and call it done!
- Sets the mood before the door opens
- Cheesecloth stretches easily
- A few dollar store spiders finish it
Pumpkin Spice Candle Jars
Pumpkin spice candles poured into little jars smell like the whole season in one flicker. Cinnamon sticks tucked along the inside of the jar add a nice touch.
Just make sure the wax has cooled enough or they will slide right off. The scent still carries way better than store-bought ones ever do!
These make great gifts for neighbors who already start decorating in September, lol!
- Smells like the whole season
- Cinnamon sticks press right into wax
- Cools in about two hours
Halloween Wreath With Fabric
A fabric wreath skips the usual foam pumpkin look and goes for soft ribbon loops instead. Layer black, orange and cream fabric strips onto a wire frame for something that actually matches a front porch.
It holds up through wind and rain far better than paper decorations do. A quick coat of fabric spray helps it last even longer.
- Handles wind way better than paper
- Wire frame from the craft aisle
- Fabric strips tie on, no glue
Haunted House Shoebox Diorama
A shoebox turns into a full haunted house diorama with black paint, some cut out windows and a few plastic bugs tucked inside. It’s basically a dollhouse for the spooky season!
This is a fantastic rainy afternoon project since every layer gives it time to dry. Who doesn’t love an excuse for a slow craft day?
- A dollhouse for the spooky season
- Cardboard scraps build the roofline
- Plastic bugs sold in bulk bags
Wine Cork Pumpkins
Leftover apple cider corks glued together and painted orange make surprisingly cute mini pumpkins. A green stem cut from a bit of ribbon finishes the look.
They cost basically nothing since the corks were headed for the trash anyway. People always assume you bought these at a boutique somewhere!
- Looks store bought for basically free
- Hot glue holds corks together
- Ribbon stem takes ten seconds
Spray Painted Skull Decor
Plastic skulls from the dollar store get a whole new life with a can of matte black or metallic spray paint. Line a few up on a shelf and it reads as intentional decor instead of cheap plastic.
Gold or silver spray gives them an almost fancy look, which feels a little funny to say about skulls, haha!
- Turns plastic into something fancy
- Matte black hides the plastic shine
- Metallic spray dries in minutes
DIY Halloween Luminary Bags
Paper lunch bags filled with sand and a tea light line a walkway with almost no effort. Punch a few star or moon shapes into the front for extra glow!
This is one of those crafts that looks way more impressive than the ten minutes it actually takes. Neighbors always ask where you bought them.
- Ten minutes for a whole walkway
- Sand keeps the bag standing
- Tea lights sold in big packs
Tissue Paper Ghost Balloons
White balloons with a marker face taped underneath become floating ghosts in about two minutes each. Cluster a bunch near the ceiling, or tie them to a porch railing.
They drift a little in the breeze, which honestly makes them creepier than any craft that stays still. Not in my book do balloons usually pull off spooky, but these do!
- Drifts in the breeze on its own
- Marker face dries instantly
- Tissue tail cut in one snip
Halloween Mason Jar Candy Dispenser
A mason jar with a hole cut in the lid turns into a candy dispenser that’s honestly more fun than a regular bowl. Paint the glass and label it something spooky.
The neighborhood kids at the door always comment on this one before they even reach for the candy. Who doesn’t love a little theater with their treats?
- More fun than a regular candy bowl
- Lid hole cuts with a box cutter
- Chalkboard label wipes clean
Spooky Tree Branch Centerpiece
A bare tree branch stuck in a vase and spray painted black makes a surprisingly dramatic centerpiece. Hang tiny bats or ghosts from the branches for extra flair!
This is the kind of decor that looks expensive but costs almost nothing at all, lol!
- Looks pricey, costs almost nothing
- Branch from the yard works fine
Yarn Wrapped Pumpkin Decor
Yarn wrapped around a foam pumpkin base turns it into a soft, huggable centerpiece. Orange, cream and deep green all work well mixed together.
Watch out for loose ends, they unravel if you do not glue them down. It feels more autumn than scary, which is exactly the point.
This one doubles as a fall decoration that can stay out well past October, no shame in that!
- Stays out well past October
- Foam base from the craft aisle
- Yarn wraps in under an hour
Handmade Halloween Garland Banner
A handmade banner strung with felt or paper triangles spelling out BOO or SPOOKY adds instant personality to a mantel. Mix fonts and colors for something that doesn’t look mass produced.
Twine and a few clothespins are really the only extra supplies needed here. How easy is that?
- Spells it out without shouting
- Felt triangles cut fast with a template
- Twine strings up in seconds
Pumpkin Carving Stencil Ideas
Stencils take pumpkin carving from a messy guessing game to something that actually looks intentional. Tape the design on, poke the outline with a pin and carve along the dots.
Cat silhouettes and simple bats are the most forgiving shapes for a first attempt. Beginners tend to get the cleanest results with those two.
- Turns guesswork into a clean design
- Pin pricks mark the outline fast
- Cat silhouettes forgive shaky hands
Halloween Door Hanger Sign
A wooden door hanger with a painted greeting sets the whole tone before anyone even knocks. Keep the message short since bigger letters read better from the sidewalk.
This is a nice one to personalize with a name or street number too.
- Readable from the sidewalk
- Stencil letters keep it neat
Creepy Cloth Ghost Yard Stakes
Cloth stretched over a wire frame and staked into the lawn makes a ghost that actually moves in the wind. It’s a classic yard decoration for a reason, it works every single time!
Old white sheets work perfectly here, so there’s no need to buy new fabric.
- Moves on its own in the wind
- Old sheet does the whole job
- Wire frame stakes right into grass
Spider Egg Sac Decorations
Cotton balls stretched and tucked into corners make convincing spider egg sacs with almost zero effort. Tuck a few plastic spiders into the fluff for the full unsettling effect.
This is the kind of small detail that makes guests do a double take at the doorway. I can’t!
- Makes guests do a double take
- Cotton stretches thin with fingers
Halloween Mantel Decor Ideas
A mantel styled with black candles, dried branches and a few carved pumpkins pulls a whole room together. Layer in different heights so the eye has somewhere to travel.
Not every piece needs to be spooky either. A few warm-toned pumpkins soften the whole display.
- Varied candle heights add drama
- Dried branches from the yard
DIY Halloween Welcome Mat
A stenciled welcome mat is one of those small touches that makes a huge first impression. Fabric paint over a plain mat holds up through rain and foot traffic just fine!
This project takes about thirty minutes and lasts through several Halloweens.
- Lasts through several Halloweens
- Fabric paint resists rain
- Stencil lines up in one try
Fabric Pumpkin Table Runner
A fabric table runner sewn from autumn print with little pumpkin shapes stitched along the edge dresses up a dinner table fast. No sewing machine?
A no-sew version with fabric glue works just as well!
This is a nice one to bring out again for Thanksgiving too, since the colors carry right over.
- Carries right over into Thanksgiving
- Print fabric from the remnant bin
Halloween Lantern Jar Centerpiece
A cluster of lantern jars filled with fake spiders, moss and a flickering light makes a great centerpiece for a table or entryway console. Vary the jar heights for a more natural look.
This one photographs really well, which is probably why it shows up on so many Pinterest boards, haha!
- Photographs better than most decor
- Moss tucks in around the base
- Battery light flickers on its own
Spooky Window Silhouette Decor
Black paper silhouettes taped inside a window turn an ordinary house into the spookiest one on the block after dark. Witches, cats and bats are the easiest shapes to cut clean.
Backlighting is everything here. A lamp behind the window does all the work!
- Turns any house into the spooky one
- Cardstock cuts crisp edges
- Lamp light makes it pop
Halloween Trick Or Treat Bags
Plain paper bags decorated with paint, stickers or fabric scraps turn into trick or treat bags nobody will accidentally swap at the door. Handles reinforced with tape hold up through a whole night of candy.
This is a fun one to prep ahead since decorating doesn’t take long at all. Same!
- Nobody swaps this one by accident
- Reinforced handles survive a full night
Bat Silhouette Paper Craft
Cut a batch of bat silhouettes from black cardstock and arrange them flying across a wall or up a staircase. Vary the sizes so the flock looks more natural.
This is one of the cheapest crafts on this entire list. It still makes a big visual impact!
- Cardstock costs almost nothing
- Tape loops keep walls damage free
Halloween Candy Bowl Makeover
Last but definitely not least, a plain candy bowl gets a full makeover with paint, spiders and a spooky label. It turns a boring bowl into the star of the whole porch setup!
This is a fun way to use up leftover paint from other projects on this list too. Who doesn’t love a good excuse to finish an old paint can?
- Label sticks on with mod podge
Just a little note - some of the links on here may be affiliate links, which means I might earn a small commission if you decide to shop through them (at no extra cost to you!). I only post content which I'm truly enthusiastic about and would suggest to others.
And as you know, I seriously love seeing your takes on the looks and ideas on here - that means the world to me! If you recreate something, please share it here in the comments or feel free to send me a pic. I'm always excited to meet y'all! ✨🤍
Xoxo Lara